

Commercial downlights consume roughly 30% of energy in many office buildings, yet most facilities operate them far below peak efficiency. At PacLights, we’ve seen firsthand how the right commercial downlight performance tips can slash energy costs by 40% while improving light quality.
This guide walks you through selecting the right fixtures, optimizing their placement, and maintaining them for lasting results. You’ll find practical strategies that work in real facilities, not theoretical advice.
Selecting Fixtures That Match Your Facility’s Actual Needs
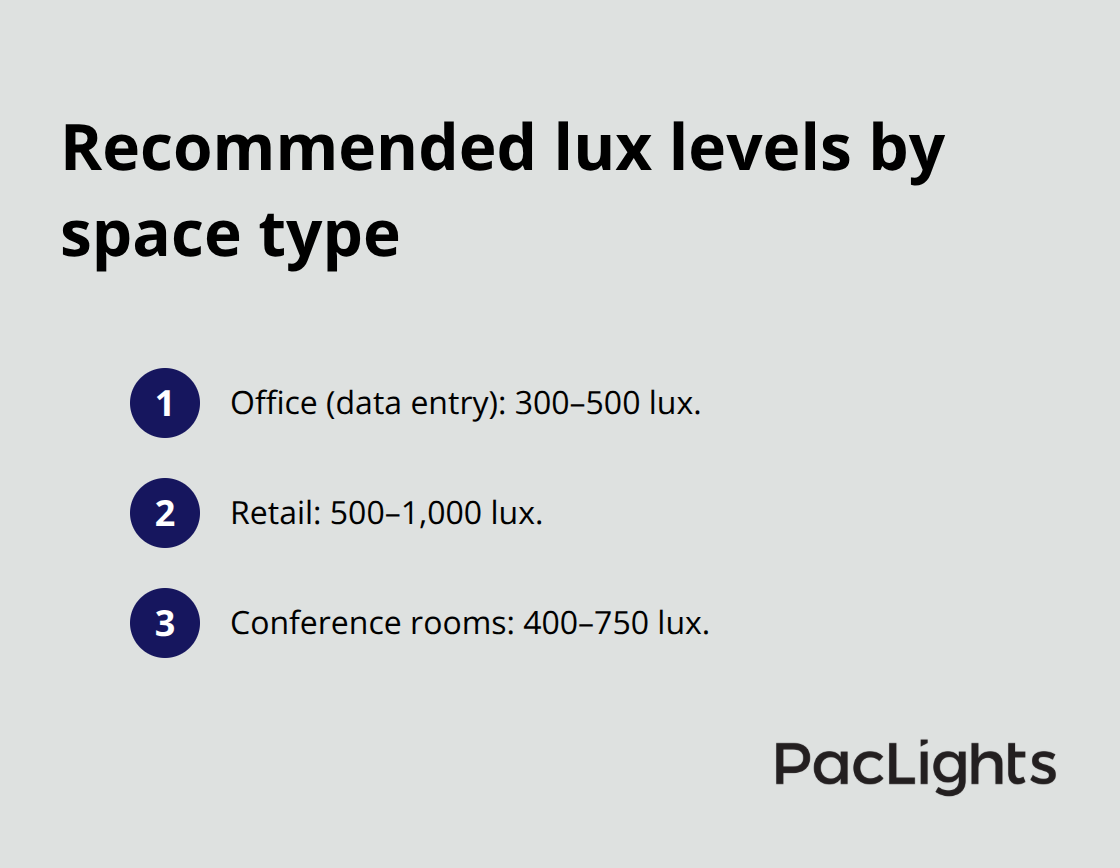
The biggest mistake facilities make is buying downlights based on a spreadsheet rather than their actual space. Office buildings with standard 9-foot ceilings need different fixtures than warehouses or retail environments. Start by measuring your ceiling height, the distance between fixtures, and the tasks performed in each area. A data entry office needs 300 to 500 lux according to the Illuminating Engineering Society, while retail spaces typically require 500 to 1,000 lux depending on the merchandise. Conference rooms fall somewhere in between at 400 to 750 lux. These numbers matter because oversizing your fixtures wastes energy and money, while undersizing creates shadows and reduces productivity.
Match Lumens to Real Lighting Levels
Lumens measure total light output, and this is where most facilities go wrong. A 4,000-lumen downlight floods a small office with excess light that drains energy, while a 2,000-lumen fixture in the same space might actually perform better. The Illuminating Engineering Society publishes specific lux requirements for different commercial spaces, and converting those requirements to lumens depends on your ceiling height and fixture spacing. Use this formula: required lumens equals lux level times area in square meters divided by a maintenance factor of 0.8. A 10-by-10-meter office requiring 400 lux needs roughly 50,000 lumens total, which spreads across multiple fixtures. If you install ten downlights, each should deliver around 5,000 lumens, not the oversized 6,500-lumen models that waste 30% of their energy output.
Color Temperature Affects Both Performance and Cost
Color temperature measured in Kelvins directly impacts how efficiently people work and how much energy you consume. Cooler light at 4,000K to 5,000K increases alertness and works well in offices, while warmer 3,000K light suits retail and hospitality environments. Energy consumption stays relatively consistent across color temperatures, but the perceived brightness differs significantly. A 4,000K fixture feels brighter than a 3,000K fixture at the same lumen output, which means you might reduce lumens by 10% to 15% when switching to cooler temperatures without sacrificing performance. This matters because facilities often specify higher lumen counts than necessary when they select warmer color temperatures, directly inflating energy costs.
Energy Certifications Tell You What Actually Works
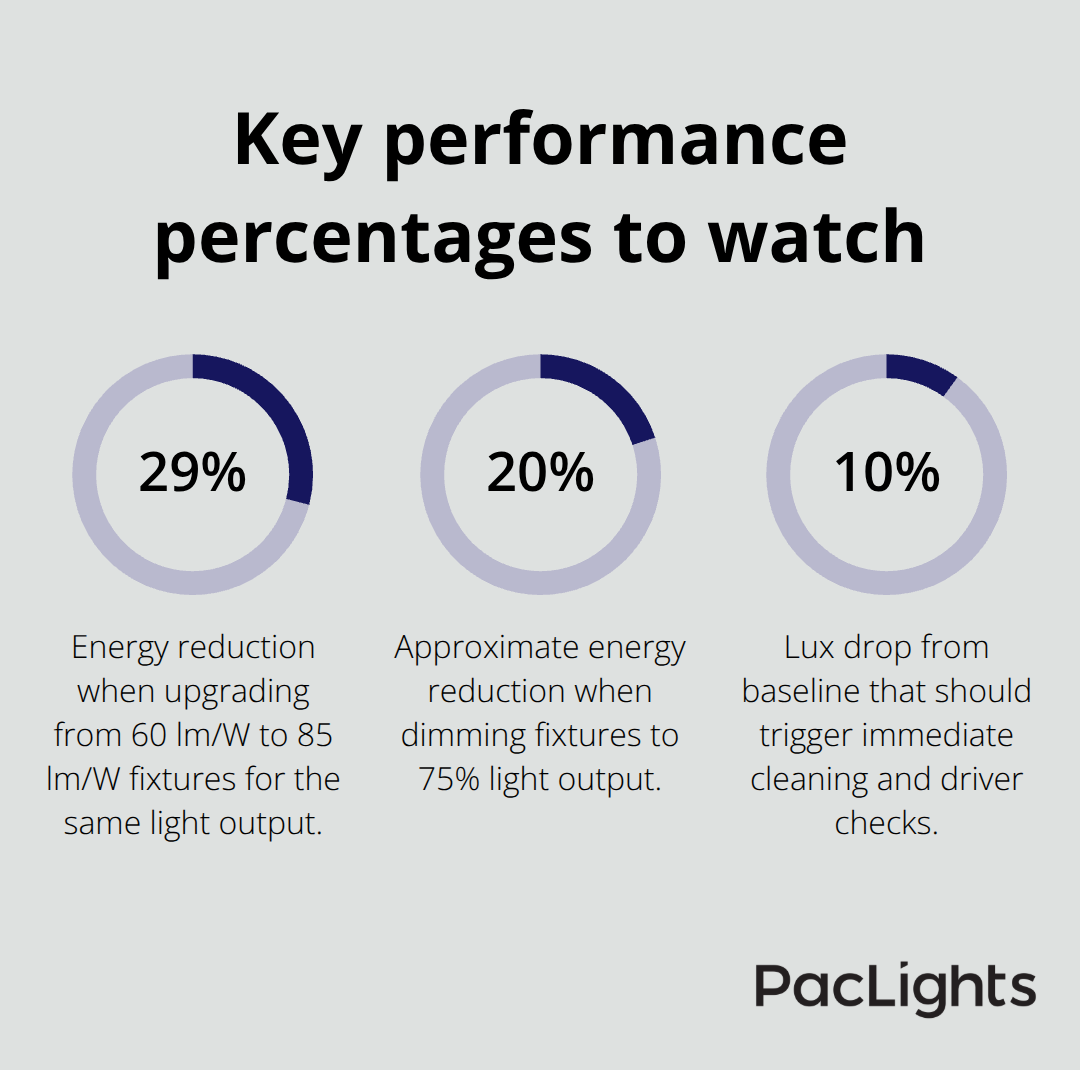
Look for downlights rated by ENERGY STAR, which requires fixtures to meet strict efficiency standards verified through third-party testing. ENERGY STAR certified commercial downlights deliver at least 70 lumens per watt and include drivers and ballasts that minimize energy loss. The Consortium for Energy Efficiency also certifies high-efficiency fixtures that exceed ENERGY STAR minimums. These certifications matter because efficiency varies dramatically between manufacturers, with some fixtures delivering 65 lumens per watt while others hit 90 lumens per watt at the same price point. Compare the lumens-per-watt rating directly on product specifications rather than relying on marketing claims. A facility upgrading 200 downlights from 60 lumens per watt to 85 lumens per watt reduces energy consumption by roughly 29% for the same light output, translating to significant annual savings.
Once you’ve selected the right fixtures for your space and verified their efficiency ratings, the next step involves placing them correctly. Installation height and spacing determine whether your downlights actually deliver the performance you calculated on paper.
How to Position Downlights for Actual Light Distribution
Installation height and spacing decisions determine whether your downlights create even illumination or dark patches that force occupants to work under inadequate light. Most facilities install downlights based on standard grid patterns rather than actual light distribution, which wastes energy on overlapping coverage in some areas while leaving others underlit. The inverse square law governs downlight performance: light intensity decreases with the square of the distance from the source, meaning a fixture installed two feet lower delivers four times more light at the work surface than one installed ten feet higher.
Spacing Fixtures to Eliminate Dark Zones
For a standard 9-foot ceiling office, downlights should space approximately 1.2 to 1.5 times the mounting height apart, which translates to roughly 11 to 13 feet between fixtures. If your fixtures space 20 feet apart on a 9-foot ceiling, you’ve created significant dark zones between them and wasted energy overlighting the areas directly below each fixture. Test your actual spacing by measuring illumination at multiple points across the floor using a smartphone light meter app like Lux Light Meter, which provides reasonably accurate readings for comparison purposes. Adjust fixture positions or add additional downlights if coverage falls below your target lux levels.
Beam Angle Selection Controls Efficiency and Light Distribution
Downlights typically offer beam angles between 20 degrees for narrow spotting and 120 degrees for wide flood coverage, and choosing the wrong angle wastes energy or creates poor light distribution. A narrow 30-degree beam concentrates light in a small circle directly below the fixture, which works for accent lighting in retail but creates harsh shadows and dark corridors in open offices. A 60-degree medium beam spreads light more evenly across work surfaces while maintaining efficiency, making it the standard choice for most commercial offices. A 120-degree wide beam floods large areas but reduces light intensity significantly, requiring higher wattage to achieve the same lux levels.
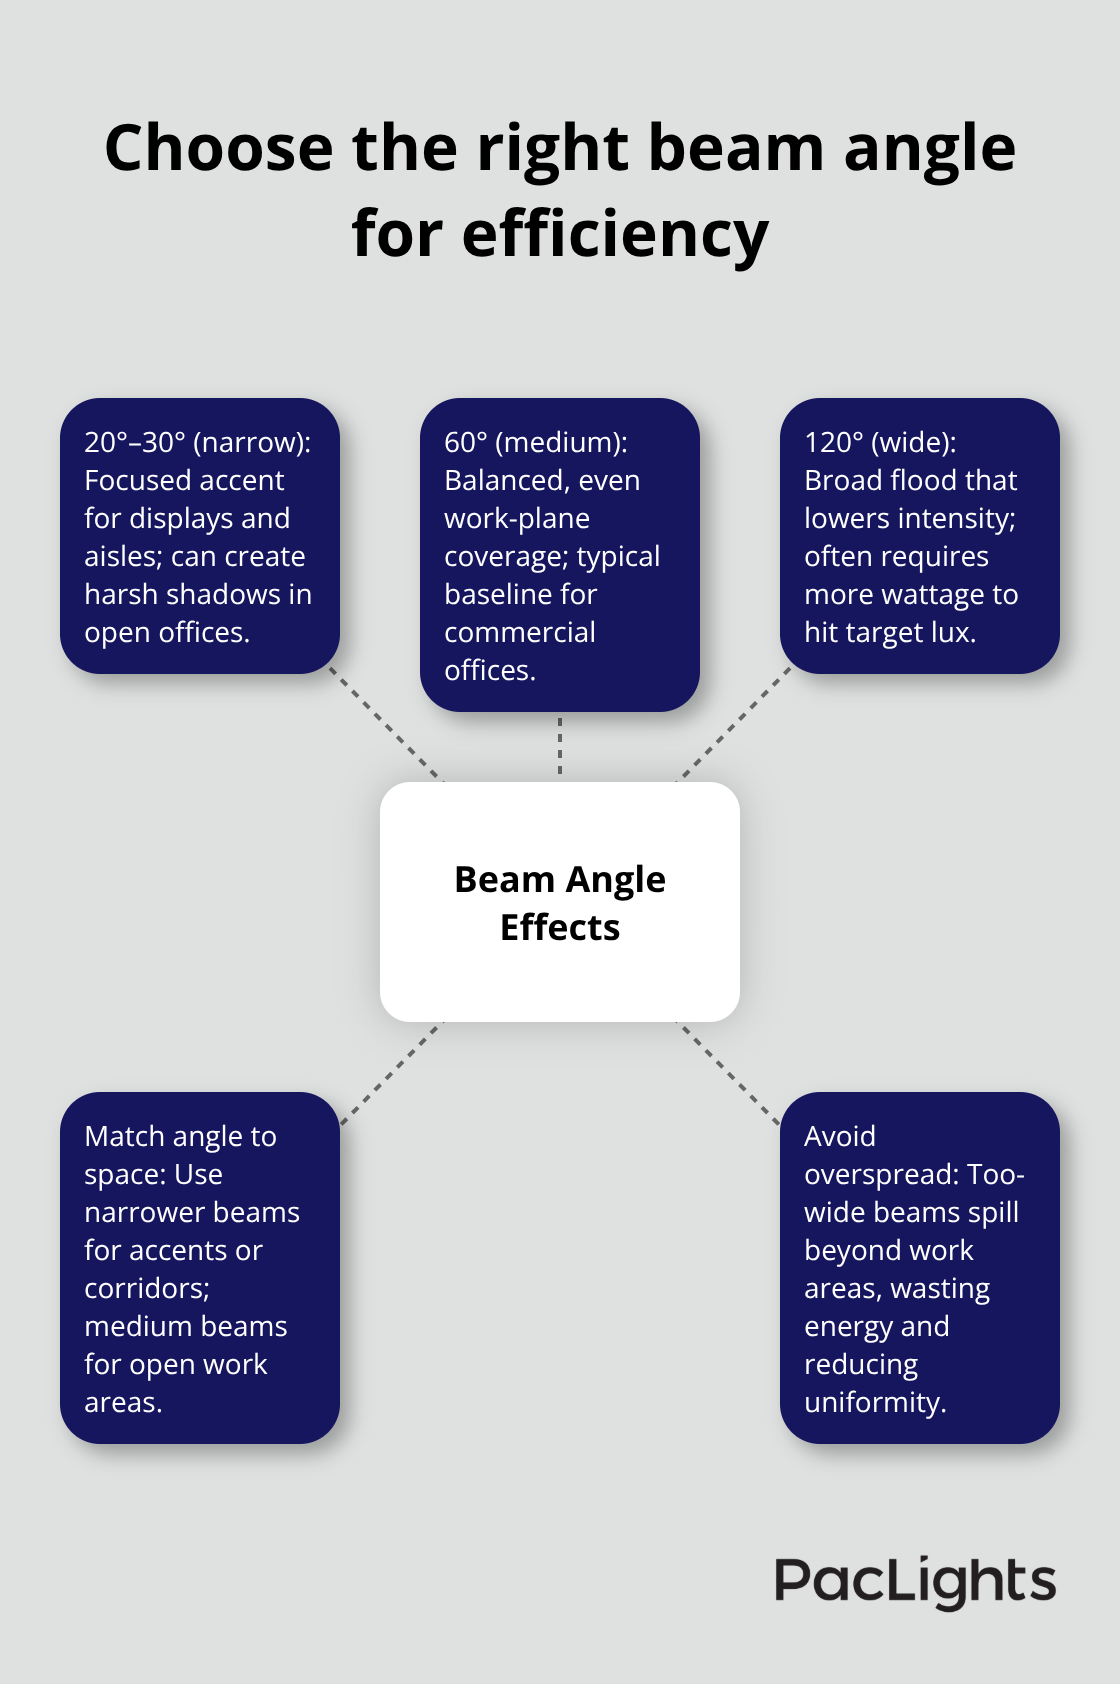
Calculate the diameter of the light circle at your work surface using this formula: diameter equals twice the height times the tangent of half the beam angle. A 30-degree beam on a 9-foot ceiling creates roughly a 5-foot diameter circle, while a 60-degree beam creates an 11-foot circle. This calculation shows why wide beams waste energy in narrow hallways or small offices where the light spreads beyond the actual work area. Try selecting beam angles that match your space dimensions exactly, not the largest angle available.
Dimming and Occupancy Controls Reduce Energy Consumption
Installing dimming drivers and occupancy sensors reduces energy consumption by 20% to 40% in typical commercial spaces without requiring fixture replacement. Motion sensors automatically reduce light levels to 20% or 30% when rooms sit empty, then restore full brightness within seconds when occupants return, which proves especially effective in conference rooms, restrooms, and storage areas where usage patterns remain unpredictable. Infrared sensors detect body heat and work reliably for up to 30 feet, while microwave sensors penetrate obstacles but occasionally trigger false activation from movement outside windows.
Daylight harvesting systems measure ambient light and dim downlights automatically when natural light provides sufficient illumination, reducing energy consumption by 15% to 25% in perimeter zones according to the Illuminating Engineering Society. Install daylight sensors on south and west-facing windows first, where solar gain peaks during afternoon hours and represents the largest energy-saving opportunity. Dimming to 75% light output reduces energy consumption by roughly 20% because LED fixtures operate most efficiently near full power, meaning modest dimming provides disproportionate savings compared to aggressive dimming to 40% or lower levels.
Advanced Controls Integrate with Building Systems
Networked lighting controls integrate with building automation systems and allow facility managers to adjust light levels across zones remotely and generate performance reports showing actual energy consumption versus baseline projections. These systems typically cost 30% more than standalone motion sensors and dimming drivers, but they provide visibility into performance across your entire facility. Advanced lighting controls further optimize energy use alongside optional daylight or motion control features built into modern fixtures.
With your downlights positioned correctly and controls installed, maintenance becomes the final factor that determines whether your system maintains peak performance over time.
Maintenance and Long-Term Efficiency
Clean Lenses Quarterly to Restore Light Output
Dust and debris accumulation on downlight lenses reduces light output by 15% to 25% within the first year of operation, yet most facilities ignore cleaning entirely until performance visibly declines. Establish a quarterly cleaning schedule rather than waiting for problems to emerge. Use a soft microfiber cloth slightly dampened with distilled water to wipe fixture lenses, avoiding harsh chemicals that degrade lens coatings over time. For fixtures mounted above 12 feet, use a lift or extended pole with microfiber attachments rather than ladders, which reduces safety risks and ensures consistent cleaning across all fixtures.
Facilities in dusty environments like warehouses or manufacturing spaces should clean monthly instead of quarterly, as dust accumulation accelerates dramatically in these settings. Track cleaning dates in a maintenance log alongside light output measurements to correlate performance improvements directly to cleaning efforts. A 50,000-square-foot office building with 200 downlights typically requires 12 to 16 hours quarterly on cleaning, which costs roughly 300 to 400 dollars depending on labor rates. This investment recovers itself within months through improved light output that eliminates the need for premature fixture upgrades.
Monitor Light Output Every Six Months
Measuring actual light output over time reveals whether your downlights maintain performance or gradually decline, allowing you to address problems before occupants notice inadequate lighting. Install a smartphone light meter app like Lux Light Meter and measure illumination at the same five to ten locations every six months, recording results in a spreadsheet to track trends. If lux levels drop more than 10% from baseline measurements, schedule immediate cleaning and check driver performance.
LED drivers occasionally degrade prematurely, reducing output by 5% to 8% annually in poorly ventilated spaces where heat accumulates around fixtures. Request driver replacement under warranty if degradation exceeds normal expectations rather than replacing entire fixtures. Networked lighting controls automatically log performance data and alert facility managers when lux levels fall below target thresholds, eliminating manual measurement altogether. These systems typically cost 2,000 to 5,000 dollars to install across a medium-sized facility but provide continuous visibility into downlight performance.
Plan Upgrades to Current LED Technology
Plan LED technology upgrades every 10 to 12 years, as newer fixtures deliver 15% to 25% better efficiency than models from a decade ago while consuming less energy for the same light output. A facility upgrading 150 downlights from 2014-era models to current LED technology typically recovers the investment within 4 to 6 years through reduced energy consumption and maintenance costs combined. Newer fixtures also feature improved driver reliability and longer rated lifespans, which further reduces long-term maintenance expenses and operational disruptions.
Final Thoughts
Optimizing commercial downlight performance tips delivers measurable results that extend far beyond reduced energy bills. Facilities that implement these strategies typically see energy consumption drop by 30% to 40% while simultaneously improving light quality and occupant satisfaction. A 50,000-square-foot office with 200 downlights consuming 400 watts each spends roughly 35,000 dollars annually on lighting energy at average commercial rates, and reducing consumption by 35% through proper fixture selection, strategic placement, and control systems saves 12,000 dollars per year.
Starting your upgrade requires three concrete steps: audit your current fixtures and measure actual light levels across your facility using a smartphone light meter app to establish baseline performance, calculate your specific lux requirements based on space type and task to identify which fixtures need replacement or repositioning, and prioritize high-impact changes like adding motion sensors to conference rooms and restrooms (which deliver quick payback periods with minimal installation complexity). Quarterly cleaning and preventive maintenance add minimal cost while protecting your investment by maintaining light output over time. Most facilities recover their optimization investment within 18 to 24 months, then enjoy pure savings for the remaining lifespan of their fixtures.
Visit PacLights to explore retrofit solutions and control options tailored to your specific facility needs. Our energy-efficient fixtures paired with optional daylight and motion controls eliminate the guesswork from commercial lighting decisions. We help facilities navigate this process through lighting layout designs and ROI assessments that show exactly what your optimization investment will return.
Disclaimer: PacLights is not responsible for any actions taken based on the suggestions and information provided in this article, and readers should consult local building and electrical codes for proper guidance.