

Linear track lighting transforms any room with sleek, modern illumination that adapts to your changing needs. This versatile lighting solution offers both style and functionality for homeowners.
We at PacLights see many DIY enthusiasts tackle this project successfully with proper planning and technique. The installation process requires basic electrical knowledge and attention to safety protocols.
What Should You Plan Before Installing Track Lighting
Start by measuring your room dimensions and ceiling height to determine the optimal track length and position. The typical installation height ranges from 7 to 8 feet above the floor, but rooms with 9-foot ceilings or higher benefit from tracks mounted closer to 8.5 feet. Calculate 300-400 lumens per fixture for general needs, and space fixtures 4 to 6 feet apart for balanced light distribution.

Select Your Track System Components
Choose line-voltage systems for most residential applications since they operate at standard 120 volts and offer the widest fixture compatibility. Track systems come in three standard styles: Halo H-style, Juno J-style, and Lightolier L-style (each requires compatible fixtures). Standard track lengths of 2, 4, 6, and 8 feet can be combined or cut to custom dimensions. Aluminum tracks provide superior durability and heat dissipation compared to steel alternatives.
Gather Essential Tools and Safety Equipment
Collect these specific tools before you start: voltage tester, drill with spade bits, fish tape, wire strippers, reciprocating saw, toggle bolts, and a sturdy ladder rated for your weight plus equipment. Purchase plastic wire connectors rated for your electrical load and electrical tape for secure connections. The U.S. Department of Energy reports that LED track fixtures can reduce energy costs by 75% compared to traditional bulbs, which makes them the preferred choice for long-term savings.
Verify Your Electrical Circuit Capacity
Check that your electrical circuit can handle the additional load before you purchase fixtures. Most residential circuits operate at 15 or 20 amps, and you should calculate the total wattage of all planned fixtures to avoid overload. A standard 15-amp circuit can safely handle up to 1,440 watts of continuous load (though electricians recommend staying below 80% of capacity for safety).
With your plan complete and materials ready, you can move forward to the actual installation process.
How Do You Install Linear Track Lighting
Prepare Your Electrical System Safely
Safety takes priority when you work with electrical systems. Turn off power at the main circuit breaker and confirm it’s off with a voltage tester before you touch any wires. Remove the existing fixture by unscrewing the mounting screws and carefully disconnect the wires. Take a photo of the wire connections for reference during installation. Clean the electrical box and verify it can support the track system’s weight (typically 15-20 pounds for a standard 4-foot track with fixtures).
Mount the Track System
Position the track 18 to 24 inches from walls for optimal light coverage and mark the locations with a pencil. Locate ceiling joists with a stud finder for the strongest support, as drywall anchors alone won’t hold the weight reliably. Drill pilot holes and secure the track with 2.5-inch wood screws into joists, or use heavy-duty toggle bolts rated for at least 50 pounds if joists aren’t available. The track must be level and straight, so use a spirit level and adjust as needed.
Connect the Electrical Components
Install the power feed connector at your chosen location along the track, typically near the center for balanced power distribution. Connect the house wires to the feed connector with wire nuts: black wire to black (hot), white wire to white (neutral), and green or bare copper to the grounding screw. Wrap all connections with electrical tape for added security. Insert the connector into the track channel and secure it with the provided plate.
Install and Test Your Fixtures
Attach your selected fixtures to the track by aligning them with the channel and twist until they lock in place. Install LED bulbs with at least 90 CRI for accurate color rendering, and test each fixture before final positioning. Turn the power back on and adjust fixture angles to eliminate shadows and achieve your desired pattern.
Even with careful installation, you may encounter common issues that require troubleshooting techniques to achieve optimal performance.
What Installation Problems Can You Fix Yourself
Track installation problems fall into three categories that you can resolve without an electrician. Mounting issues appear when tracks sag or pull away from the ceiling, which happens when you use insufficient fasteners or miss ceiling joists. Check each mounting point and replace drywall anchors with toggle bolts rated for 75 pounds minimum.
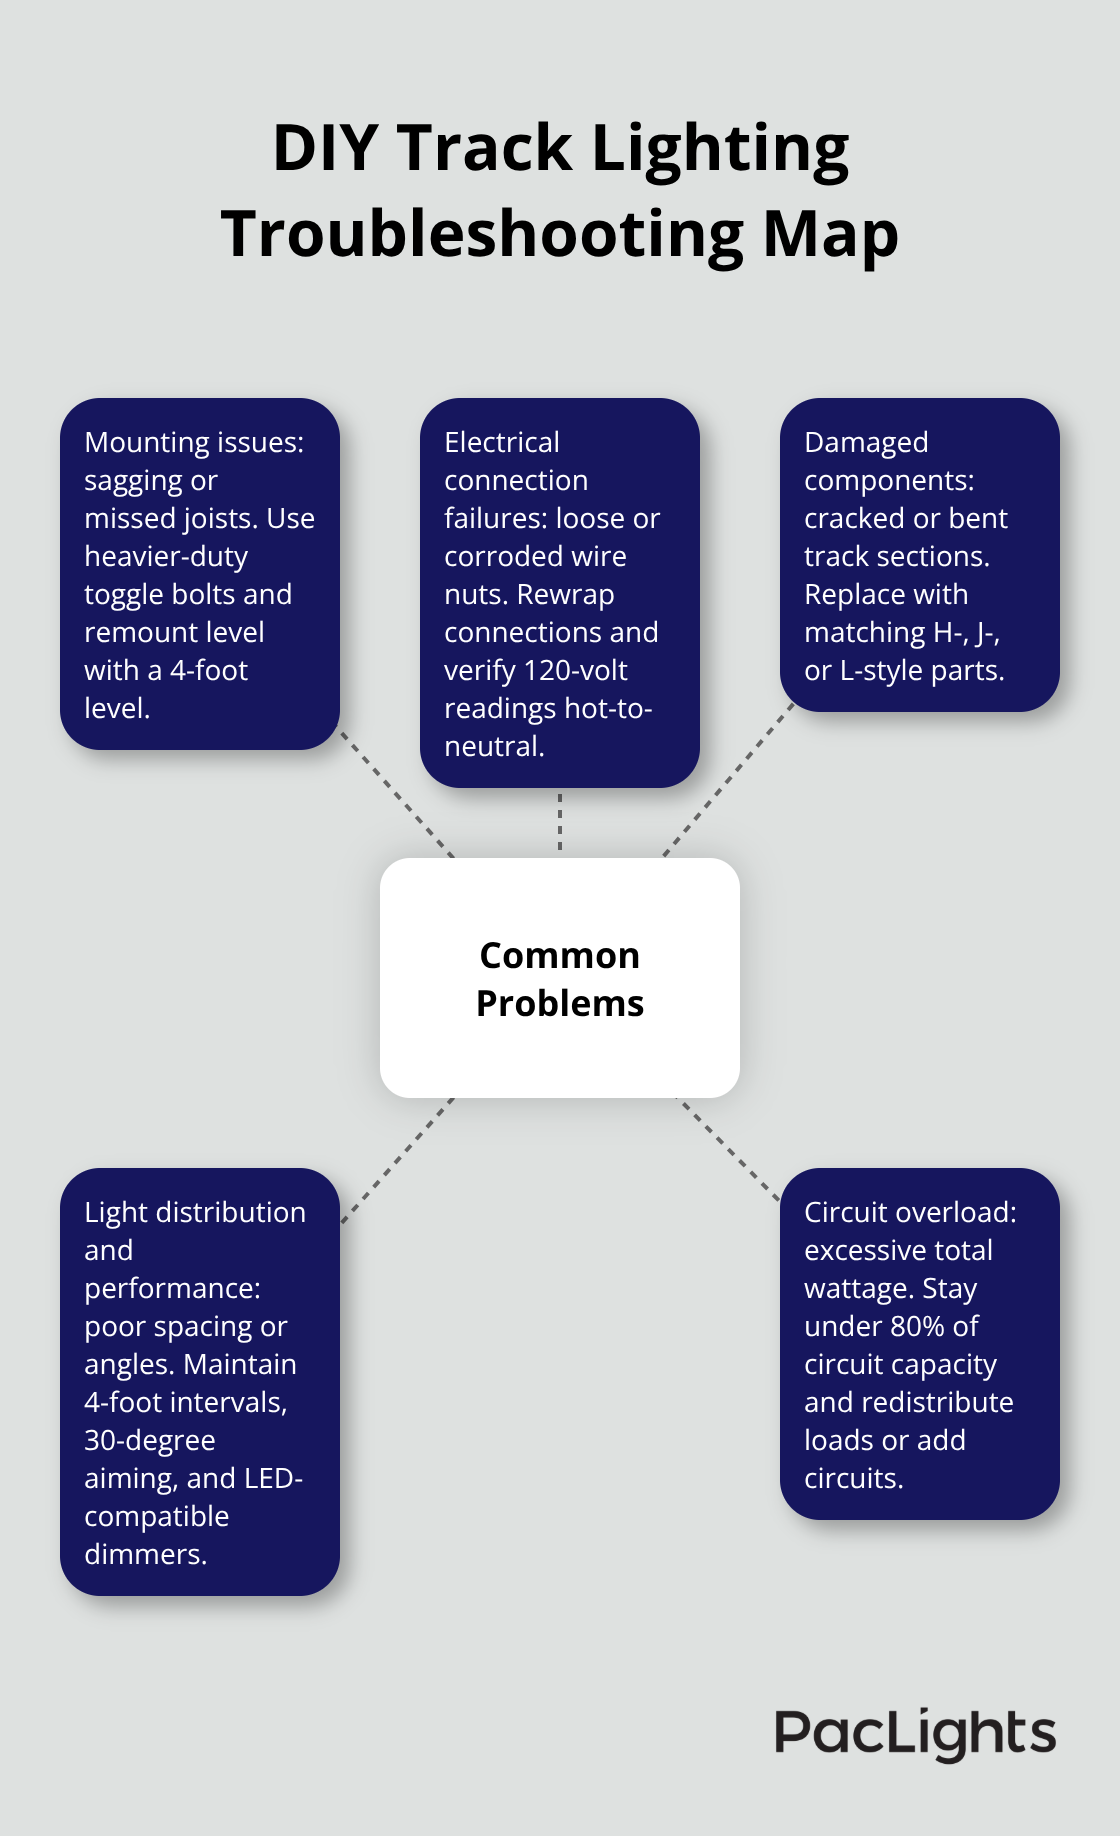
Tracks that appear crooked need complete remounting with a 4-foot level to verify straight alignment. Gaps between track sections indicate poor connections that create electrical continuity problems and cause lights to flicker.
Fix Electrical Connection Failures
Flickering or non-functional fixtures signal wiring problems at the power feed connection. Turn off the circuit breaker and remove the feed connector to inspect wire nuts for looseness or corrosion. Rewrap connections with fresh electrical tape and test with a multimeter for 120-volt readings between hot and neutral wires. Poor track-to-fixture contact causes intermittent operation, so clean the track channels with fine sandpaper and check that fixture connectors lock securely into place.
Replace Damaged Components
Replace damaged track sections rather than attempt repairs, as compromised electrical pathways create fire hazards. Cracked or bent tracks cannot maintain proper electrical contact and pose safety risks. Order replacement sections that match your existing track style (H-style, J-style, or L-style) to maintain compatibility with your fixtures.
Optimize Light Distribution and Performance
Uneven lighting results from improper fixture spacing or incorrect angles that create dark spots and glare. Reposition fixtures to maintain 4-foot intervals and angle them 30 degrees toward work surfaces for task lighting. Shadows under wall cabinets disappear when you move the track 6 inches further from the wall. LED compatibility issues cause buzzing or premature failure, so verify that your dimmer switches work with LED loads and replace magnetic ballasts with electronic drivers.
Resolve Circuit Overload Issues
Overheated fixtures indicate overcrowding on the track circuit, which requires redistributing fixtures across multiple tracks or upgrading to a 20-amp circuit. Calculate total wattage of all fixtures to stay below 80% of your circuit’s capacity (1,152 watts for a 15-amp circuit). Hot fixtures or frequent breaker trips signal that you need professional electrical work to add dedicated circuits.
Final Thoughts
Properly installed linear track lighting delivers exceptional versatility and energy savings that transform your living spaces. LED fixtures reduce electricity costs by 75% compared to traditional bulbs while they provide decades of reliable performance. Your investment pays dividends through lower utility bills and enhanced home value.

Regular maintenance keeps your system at peak efficiency. Dust fixtures monthly with a microfiber cloth and replace LED bulbs when they dim to 70% of original brightness (typically after 20,000+ hours of use). Check mounting screws annually and tighten any loose connections to prevent electrical issues.
Professional electrician services become necessary when you encounter circuit overloads, frequent breaker trips, or need additional electrical circuits. Complex installations that involve multiple rooms or smart home integration require expert knowledge of electrical codes and safety protocols. We at PacLights specialize in advanced lighting systems for commercial and industrial facilities that require professional-grade fixtures with networked controls and energy optimization features.
Disclaimer: PacLights is not responsible for any actions taken based on the suggestions and information provided in this article, and readers should consult local building and electrical codes for proper guidance.