

Linear landscape lighting transforms ordinary yards into stunning outdoor spaces that shine long after sunset. Strategic placement of LED strips and in-ground fixtures creates dramatic pathways and highlights your home’s best features.
We at PacLights see homeowners struggle with poor planning and installation mistakes that waste money and create safety hazards. This guide walks you through every step from initial design to final testing.
Where Should You Start Your Lighting Design
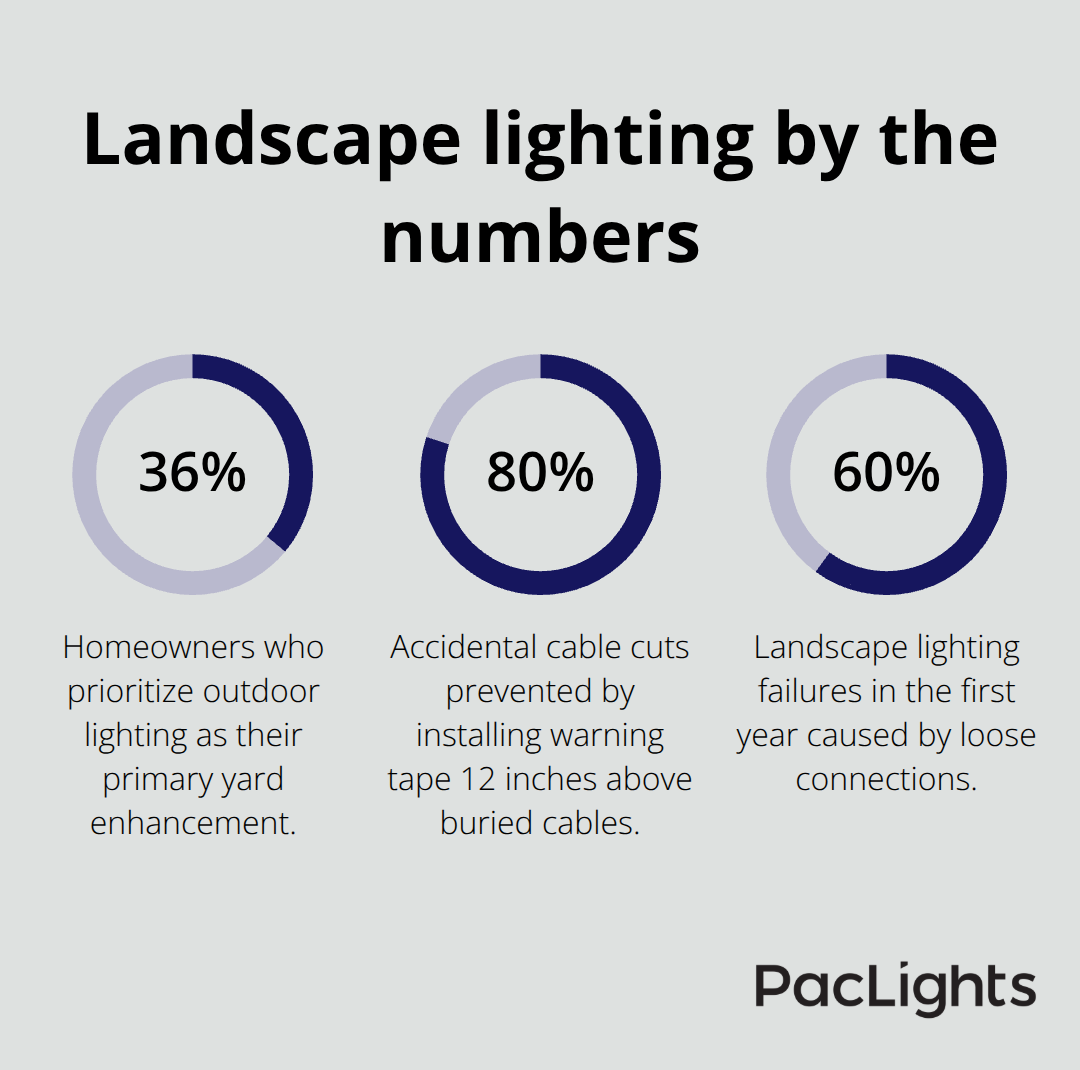
Start with a detailed yard walk during both daylight and evening hours to identify your property’s strongest architectural elements and natural features. The American Society of Landscape Architects reports that 36% of homeowners prioritize outdoor lighting as their primary yard enhancement, which makes proper planning essential for maximum impact. Focus on mature trees with interesting bark textures, stone retaining walls, water features, and architectural details like columns or unique siding materials that will benefit from linear accent lighting.
Map Your Safety and Traffic Zones
High-traffic areas demand bright, consistent illumination to prevent accidents and improve navigation. Pathways need fixtures spaced no more than 20 feet apart for safe walking, while driveways require wider beam angles to accommodate vehicle movement. Steps and elevation changes present the highest injury risk and need dedicated downward-focused lighting at each level change. Pool areas, outdoor kitchens, and entertainment spaces require task-specific lighting levels that differ significantly from ambient landscape lighting. Create separate lighting circuits for these functional zones to allow independent control and avoid over-illumination of decorative areas when safety lighting activates.
Design Distinct Lighting Zones
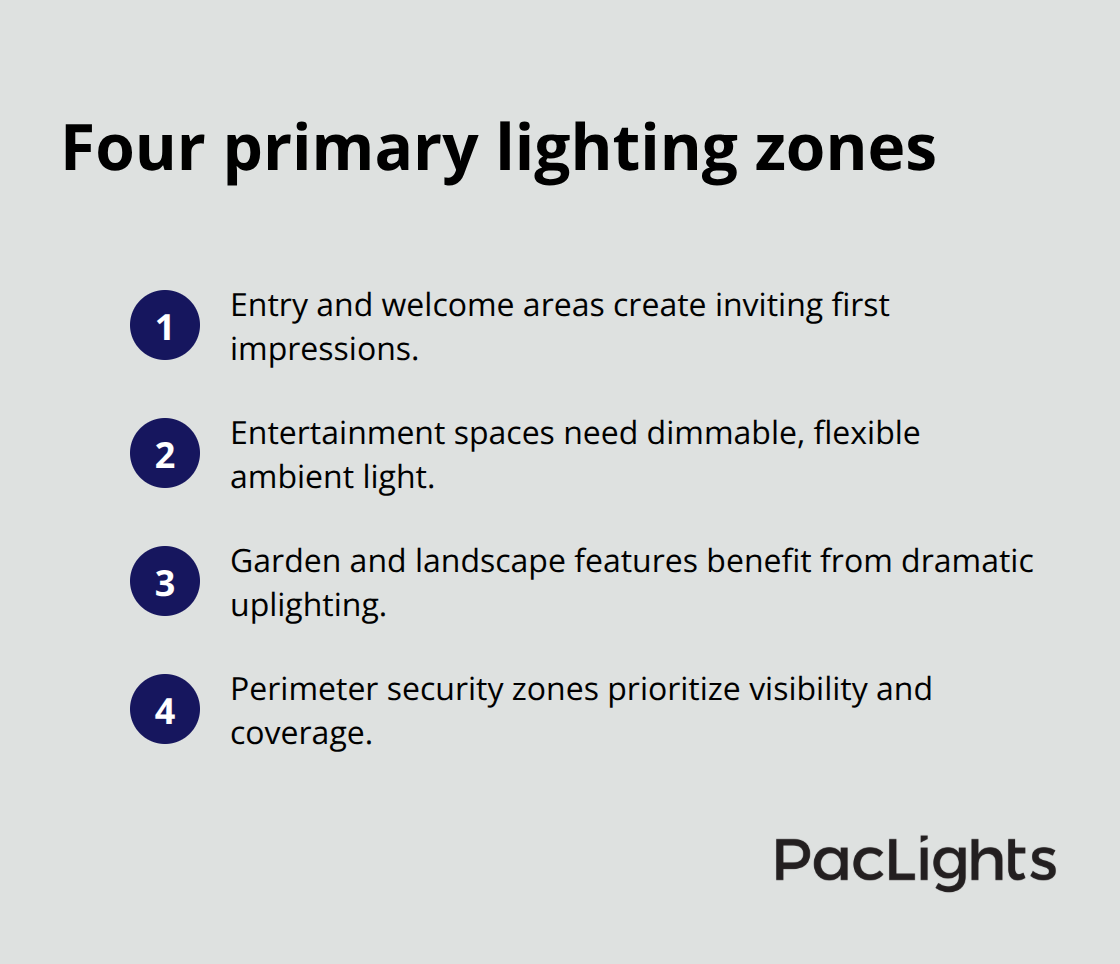
Divide your property into four primary zones: entry and welcome areas, entertainment spaces, garden and landscape features, and perimeter security zones. Entry areas should use warm 2700K color temperature linear fixtures to create an inviting atmosphere, while security zones perform better with cooler 4000K lighting that provides better visibility. Garden zones benefit from dramatic uplighting effects using in-ground linear fixtures positioned 3-4 feet from tree trunks or architectural elements. Entertainment areas need dimmable linear strips under railings, along seating walls, or integrated into hardscape features to provide adjustable ambient lighting that adapts to different activities and seasons.
Consider Your Power Infrastructure
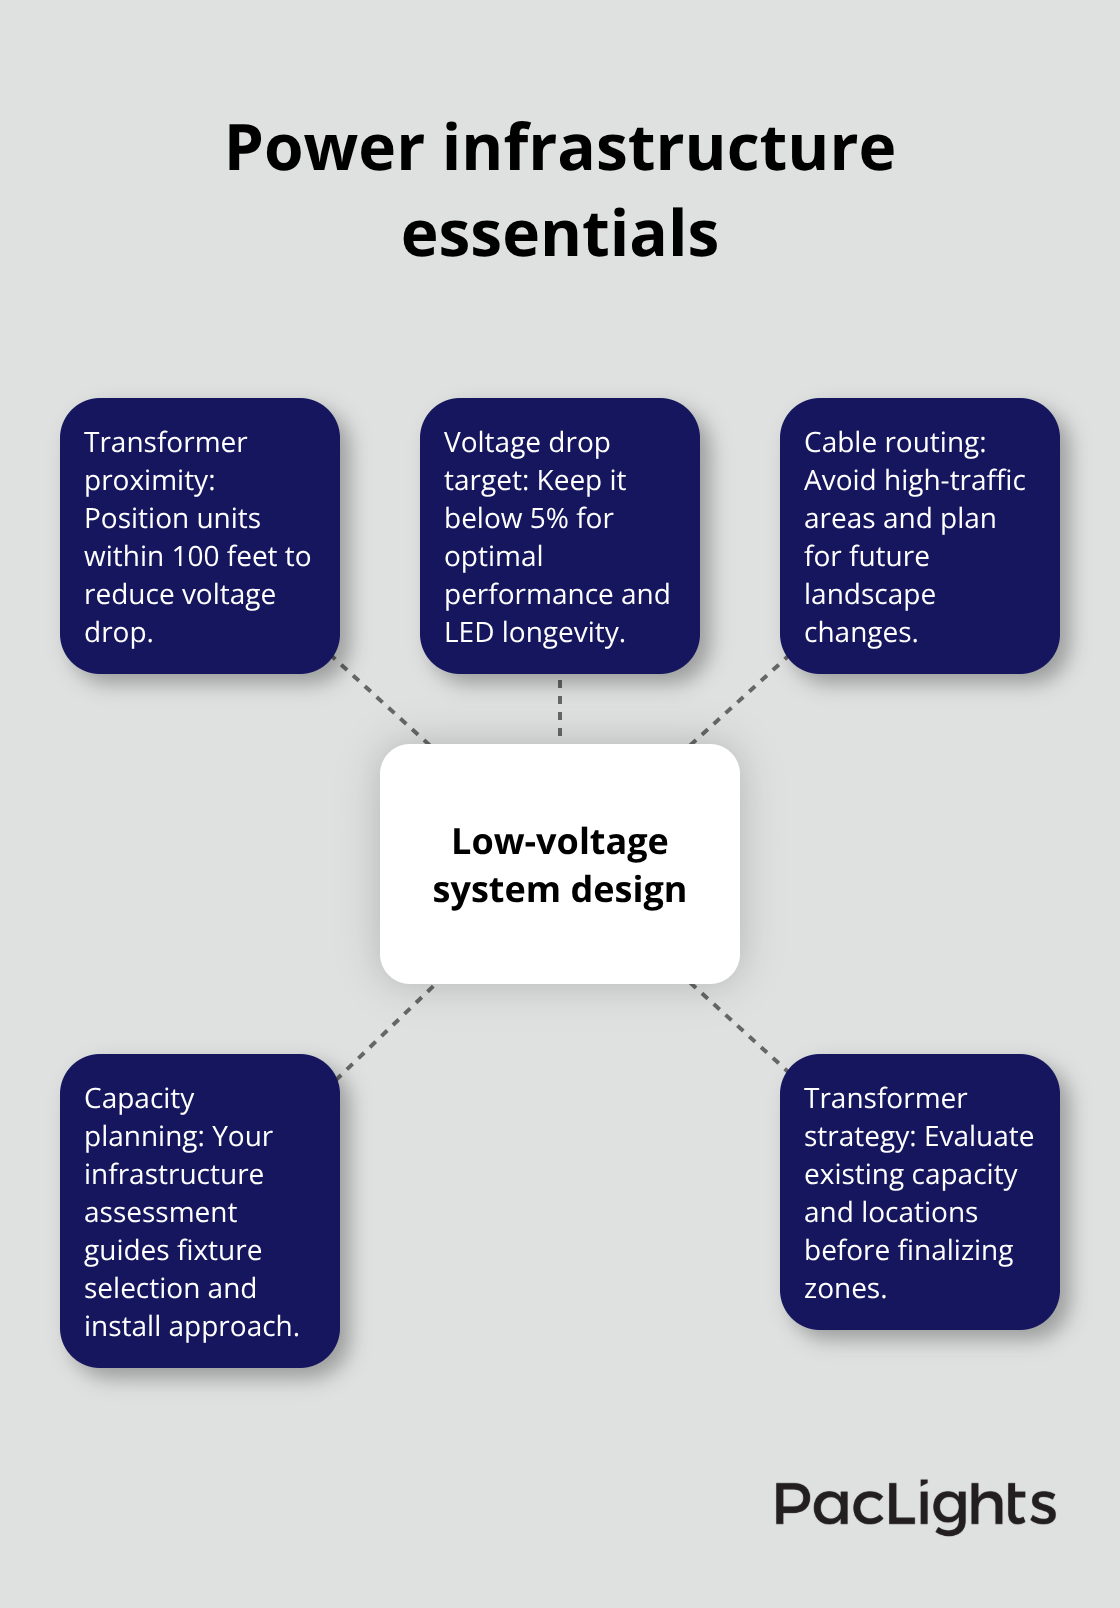
Evaluate your existing electrical capacity and transformer locations before you finalize your lighting zones. Most residential properties need additional low-voltage transformers (typically 300-600 watts) to handle linear LED installations effectively. Position transformers within 100 feet of your lighting runs to minimize voltage drop, which should stay below 5% for optimal performance. Plan wire runs that avoid high-traffic areas and consider future landscape changes that might affect buried cables. This infrastructure assessment directly influences your fixture selection and installation approach.
Which Linear Fixtures Work Best for Your Yard
LED strip lights and linear in-ground fixtures serve completely different purposes in landscape design, and the wrong choice costs both money and visual impact. Strip lights excel at accent applications like under-railing illumination, architectural outlining, and hardscape integration where you need continuous, even light distribution along surfaces. These fixtures typically consume 3-5 watts per foot and provide excellent flexibility for curved installations around planters or along irregular pathways.
In-ground linear fixtures deliver superior performance for uplighting trees, walls, and architectural features where you need focused beam control and higher light output. These fixtures range from 10-40 watts each and feature adjustable beam angles from 15 to 60 degrees for precise light placement.
Weather Ratings That Actually Matter
IP65 rating represents the minimum acceptable standard for outdoor linear fixtures and provides protection against water jets from any direction. However, installations in areas with heavy snow loads, frequent freeze-thaw cycles, or coastal salt exposure need IP67 or IP68 ratings for submersion protection.
Fixtures with die-cast aluminum housings and marine-grade powder coating outperform plastic alternatives by 3-5 years in harsh climates. Temperature ratings matter significantly more than most installers realize – fixtures rated for -40°F to 140°F prevent LED degradation and color shifts that occur with cheaper alternatives rated only to 104°F.
Stainless steel hardware and silicone gaskets add $15-25 per fixture but eliminate the corrosion failures that plague zinc-plated components after 2-3 years.
Color Temperature Strategy for Maximum Impact
Warm 2700K light creates the most natural and inviting atmosphere for residential landscapes and matches the golden hour light that photographers prize. Cooler 3000K works better for security applications and modern architectural styles with steel and concrete elements.
Mixed color temperatures within the same area create visual confusion and should be avoided completely. Brightness levels between 200-800 lumens per linear foot provide adequate illumination for most landscape applications (pathway lights require the lower end while accent uplighting needs higher output for dramatic effect).
Beam Angle Selection for Different Applications
Wide beam angles (45-60 degrees) work best for pathway illumination and general area coverage where you need even light distribution across surfaces. Narrow beam angles (15-30 degrees) create dramatic uplighting effects on trees and architectural features where you want focused light with minimal spill.
Medium beam angles (30-45 degrees) offer the most versatility for accent applications and work well for highlighting garden features or creating wall wash effects. The beam angle you choose directly affects fixture spacing – wider beams allow greater distances between fixtures while narrow beams require closer placement for continuous coverage.
Once you select the right fixtures for your specific applications, proper installation techniques become the foundation for long-term performance and safety.
How Do You Install Linear Landscape Lighting Correctly
Plan Your Trenching Strategy
Trenching depth directly determines your installation’s longevity and safety performance. Dig trenches 18-24 inches deep for all low voltage landscape lighting cables, which exceeds the National Electrical Code minimum of 12 inches and protects wires from frost heave damage that occurs in the top soil layer. Use a trenching shovel or mechanical trencher to create clean, straight cuts that minimize soil disruption and make backfill work easier.
Route cables at least 12 inches away from sprinkler lines and existing utilities to prevent accidental damage during future maintenance. Install warning tape 12 inches above buried cables to alert future excavation work – this simple step prevents 80% of accidental cable cuts according to utility damage prevention studies.
Position Transformers for Maximum Performance
Transformer placement affects your entire system’s performance and requires careful consideration of both electrical and practical factors. Position transformers on north-facing walls or in shaded areas to prevent overheating that reduces lifespan by 40% compared to units exposed to direct sunlight. Mount transformers at least 12 inches above ground level and within 10 feet of your home’s electrical panel to minimize voltage drop in the primary 120V feed.
Each 300-watt transformer supports approximately 200-250 feet of LED strip lights or 15-20 in-ground fixtures (depending on wattage specifications). Calculate your total fixture load before installation to avoid overloaded circuits that cause dimmed output and shortened LED life.
Test Each Connection Before Backfill
Test each lighting run before you backfill trenches to identify connection problems while repairs remain simple and inexpensive. Use a digital multimeter to verify 12V output at each fixture location – readings below 11V indicate voltage drop problems that cause flickering and premature LED failure. Check wire connections with gentle tugging after installation because loose connections account for 60% of landscape lighting failures within the first year.
Install GFCI protection on all transformer circuits even though low-voltage systems don’t require it – ground faults in wet soil conditions can damage expensive LED drivers and create safety hazards. Replace any fixtures that show moisture infiltration immediately because water damage spreads through connected fixtures via the low-voltage wiring system (moisture creates cascading failures that can destroy entire lighting runs).
Final Thoughts
Linear landscape lighting delivers measurable returns through increased property values, enhanced safety, and extended outdoor living seasons. Well-designed systems boost home values by 15-20% while they reduce nighttime accidents by up to 75% according to insurance industry data. Property owners see immediate benefits from their investment in both functionality and aesthetics.
Regular maintenance keeps your investment at peak performance levels. Clean fixture lenses monthly to maintain light output, inspect connections annually for corrosion, and replace damaged gaskets immediately to prevent moisture infiltration. LED strips typically last 50,000 hours while in-ground fixtures reach 60,000+ hours with proper care (professional installations often exceed these expectations).
DIY installation works well for simple pathway applications and saves $3,000-5,000 on labor costs. Complex designs with multiple zones, challenging terrain, or integration with existing electrical systems benefit from professional expertise. We at PacLights work with contractors who need reliable lighting products for demanding outdoor applications where performance and longevity matter most.
Disclaimer: PacLights is not responsible for any actions taken based on the suggestions and information provided in this article, and readers should consult local building and electrical codes for proper guidance.