

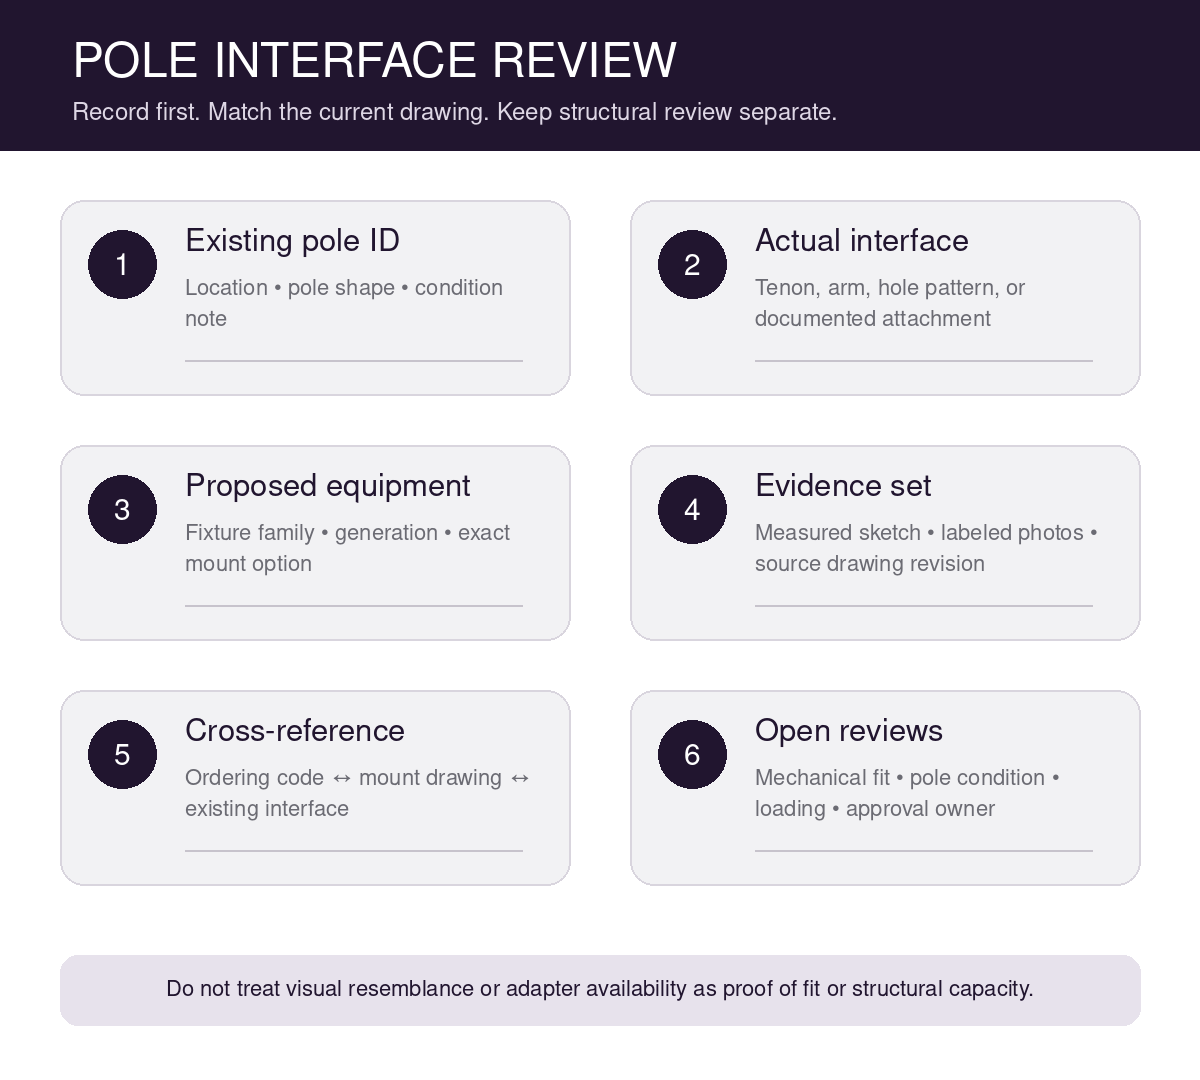
Before ordering an area light for an existing pole, confirm the exact interface between the pole and the proposed mount. A fixture family name, a photograph, or a note that the pole is “square” does not identify the attachment. The purchasing record needs to connect the existing pole, the interface that is actually present, the current fixture generation, the selected mount, and the drawing revision used for the match.
This is a coordination step, not a structural approval. A mount can appear to fit while the pole condition, loading, fasteners, foundation, or project requirements still need review by the responsible professional. Keep those questions visible rather than letting a successful dimensional cross-reference close them by implication.
Start with stable equipment identities
Give the existing pole a stable ID tied to the site plan or fixture schedule. Record its location, manufacturer and model when known, pole shape, finish, access-door orientation, and any existing arm or tenon. If the pole label is missing or unreadable, say so. Do not create a model identity from appearance alone.
Identify the proposed luminaire just as precisely. Record the family, generation, output or wattage selection, optical distribution, voltage, color setting where applicable, control options, housing color, and mount option. The current PacLights FALC area-light family is offered with several distinct mount choices, including arm, slipfitter, trunnion, flood, and wall-mount configurations. Those names describe different interfaces; they are not interchangeable labels for one universal bracket.
Use the current product page and specification for the selected generation. Product families change, and an older pole or fixture record may refer to an earlier drawing. Write down the document name, revision, and date visible in the source you reviewed. If a distributor quote uses only a family name, request the complete ordering code and mount description before accepting the interface match.
Distinguish the pole body from the attachment interface
The pole body may be square or round, but the proposed fixture connects to a more specific feature. That feature might be an arm, a tenon, a drilled pattern, a plate, or another documented attachment. Measure and photograph that actual interface. A pole’s nominal shaft size does not, by itself, establish the dimensions or geometry at the mounting point.
Record where each dimension was taken and the units. A sketch should show reference edges, centerlines, orientation, and the relationship to the pole. For a hole pattern, note which holes are existing and which hardware is present without turning the field record into drilling instructions. For a tenon or arm, show the relevant outside geometry and the available engagement area requested by the current mount drawing. If access is blocked, mark the dimension unresolved rather than estimating it from a photograph.
Photographs are most useful when they are labeled with the pole ID, viewing direction, and a scale or measured reference. Capture an overall view, the attachment, the top or side orientation as accessible, and any label or existing drawing reference. Perspective distortion can make parallel edges look tapered and can hide offsets, so a picture is supporting evidence, not a substitute for the measured sketch.
Match the interface to the current mount drawing
Place the field record beside the manufacturer’s current mount drawing. Compare the same features: interface type, required contact or engagement area, hole locations, fastener access, orientation, clearances, and any fixture- or mount-specific limits shown in the document. Do not match one isolated dimension while ignoring the geometry around it.
Then connect the drawing to the ordering code. The selected code should identify the same mount that appears in the reviewed drawing and quote. Preserve that cross-reference in the submittal or purchasing record. If the drawing and ordering information use different abbreviations, ask PacLights or the responsible supplier to confirm the relationship in writing rather than translating the code from memory.
A visual resemblance is not enough. Two arms may have a similar outline but use different hole patterns, offsets, fastener access, or fixture-side connections. A slipfitter description may still require a particular interface and engagement condition. An adapter’s existence also does not prove that it is intended for the proposed combination. Resolve the exact equipment and current documentation before treating an adapter as part of the accepted configuration.
Keep fit, condition, and structural capacity separate
The interface review answers a narrow question: does the documented mount correspond to the measured attachment geometry? It does not determine whether the existing pole and foundation are suitable for the proposed fixture, wind exposure, arm length, quantity, or site condition. Those are separate project decisions.
Record visible damage, corrosion, deformation, missing covers, loose components, or undocumented modifications without diagnosing their structural significance. Escalate the observations to the party responsible for evaluating the pole. Do not use a clean appearance as proof of capacity, and do not use a dimensional match as permission to add holes, modify the pole, or substitute hardware.
The same separation helps with existing arms. Confirm the arm identity and interface, then keep the arm, pole, fastener, loading, and foundation reviews distinct. If project documents require calculations, sealed drawings, inspections, or a specific approval path, list that requirement and its owner. The purchasing record should show which questions are closed and which remain open.
Coordinate the mount with the lighting plan
A correct mechanical interface does not establish that the selected light distribution, mounting position, or orientation matches the lighting design. Tie the proposed configuration back to the current fixture schedule and photometric plan. Confirm the optical distribution, output setting, mounting height, arm relationship, and orientation represented in the calculation.
The parking-lot photometric grid review explains why calculation boundaries, receiving planes, and report assumptions must agree before results are compared. Apply the same document-control discipline here: the mount and fixture code in the purchasing record should match the exact configuration used in the design documents.
Also keep boundary and glare questions distinct from attachment fit. The light-trespass input guide shows how fixture configuration, orientation, mounting information, receptor locations, and operating modes support a project-specific review. A new mount may affect position or orientation, but it does not establish compliance or solve a boundary concern by itself.
Resolve missing information before release
Use an open-items list rather than filling gaps with assumptions. Common gaps include an unreadable pole label, inaccessible interface dimensions, an unverified existing arm, a quote without the full mount code, conflicting drawing revisions, or a structural review that has not been assigned. Give each item an owner and a clear evidence request.
If the proposed configuration changes, preserve the earlier record and issue a revision. Note what changed: fixture generation, mount option, arm, pole, drawing, or site condition. Recheck the affected interfaces and design references instead of copying the prior acceptance forward. Replacements do not automatically inherit the fit of the equipment they replace.
Close with a configuration-specific record
A useful release package connects the pole ID, existing interface sketch, labeled photographs, proposed fixture and mount code, manufacturer drawing revision, quote or submittal, lighting-plan reference, open condition or structural reviews, and final disposition. The record should let another reviewer trace the decision without relying on an unlabeled photograph or a remembered conversation.
For a PacLights configuration review, provide the exact pole and interface information, the proposed FALC generation and mount option, current project drawings, and the unresolved question. That keeps the discussion focused on a specific documented combination before equipment is ordered.
Disclaimer: PacLights is not responsible for any actions taken based on the suggestions and information provided in this article, and readers should consult local building and electrical codes for proper guidance.