

Upgrading your lighting system can be a game-changer for your space. At PacLights, we often get questions about 2×4 troffer retrofit kits and their benefits.
In this post, we’ll explore what these kits are, how to install them, and why they’re a smart choice for modernizing your lighting. We’ll also guide you through selecting the right retrofit kit for your needs.
What Are 2×4 Troffer Retrofit Kits?
Definition and Purpose
2×4 troffer retrofit kits are lighting upgrade solutions that replace outdated fluorescent tubes in existing 2×4 troffer fixtures. These kits transform old, energy-hungry lighting systems into modern, efficient LED setups without the need for complete fixture replacement.
Components of a Retrofit Kit
A typical 2×4 troffer retrofit kit includes several key components:
- LED Light Engine: The heart of the kit, providing bright, energy-efficient illumination.
- Driver: Powers and regulates the LED, ensuring consistent performance.
- Mounting Brackets: Allow for easy installation within the existing troffer housing.
- Diffuser Panel (in some kits): Evenly distributes light and reduces glare.
Energy Savings and Performance Improvements
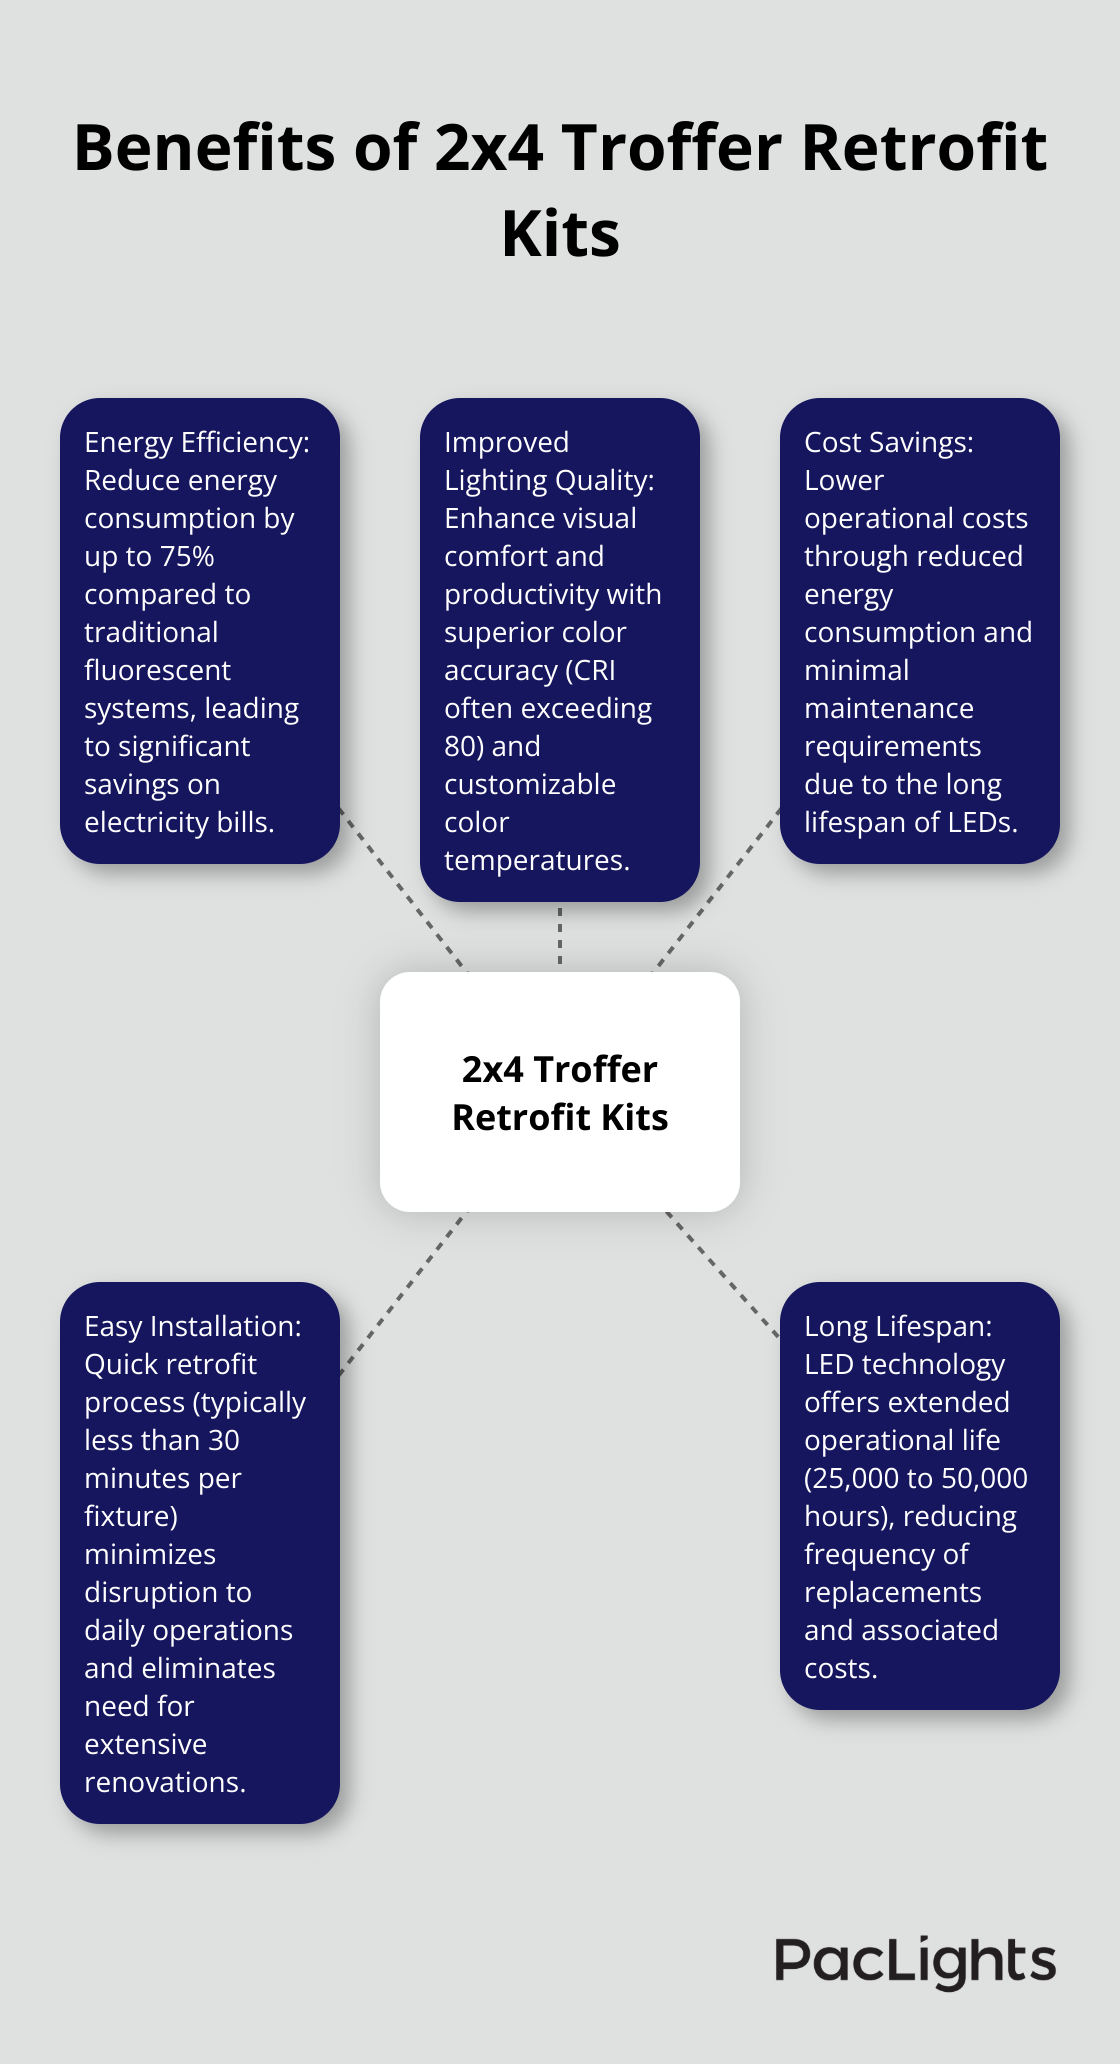
Upgrading to LED troffers through retrofit kits offers substantial benefits. The U.S. Department of Energy reports that businesses can reduce energy consumption by up to 75% compared to traditional fluorescent systems. This translates to significant cost savings on electricity bills.
LED retrofit kits also improve light quality dramatically. With a Color Rendering Index (CRI) often exceeding 80, these systems provide superior color accuracy and visual clarity. This enhancement can increase visual acuity in work environments by up to 20%, potentially boosting productivity and reducing eye strain.

Quick Installation Process
One of the most appealing aspects of 2×4 troffer retrofit kits is their ease of installation. A skilled technician can complete the retrofit process in less than 30 minutes per fixture (in most cases). This quick turnaround minimizes disruption to daily operations, making it an attractive option for busy commercial spaces.
The American Council for an Energy-Efficient Economy reports that switching to LED lighting results in an average 30% reduction in overall energy costs for businesses. This rapid return on investment, coupled with the long lifespan of LEDs (25,000 to 50,000 hours), makes retrofit kits a smart choice for facility managers who want to optimize their lighting systems.
As we move forward, it’s important to understand the installation process and considerations for these retrofit kits. Let’s explore the step-by-step guide, required tools, and common challenges you might face during the upgrade.
How to Install a 2×4 Troffer Retrofit Kit
Preparation and Safety
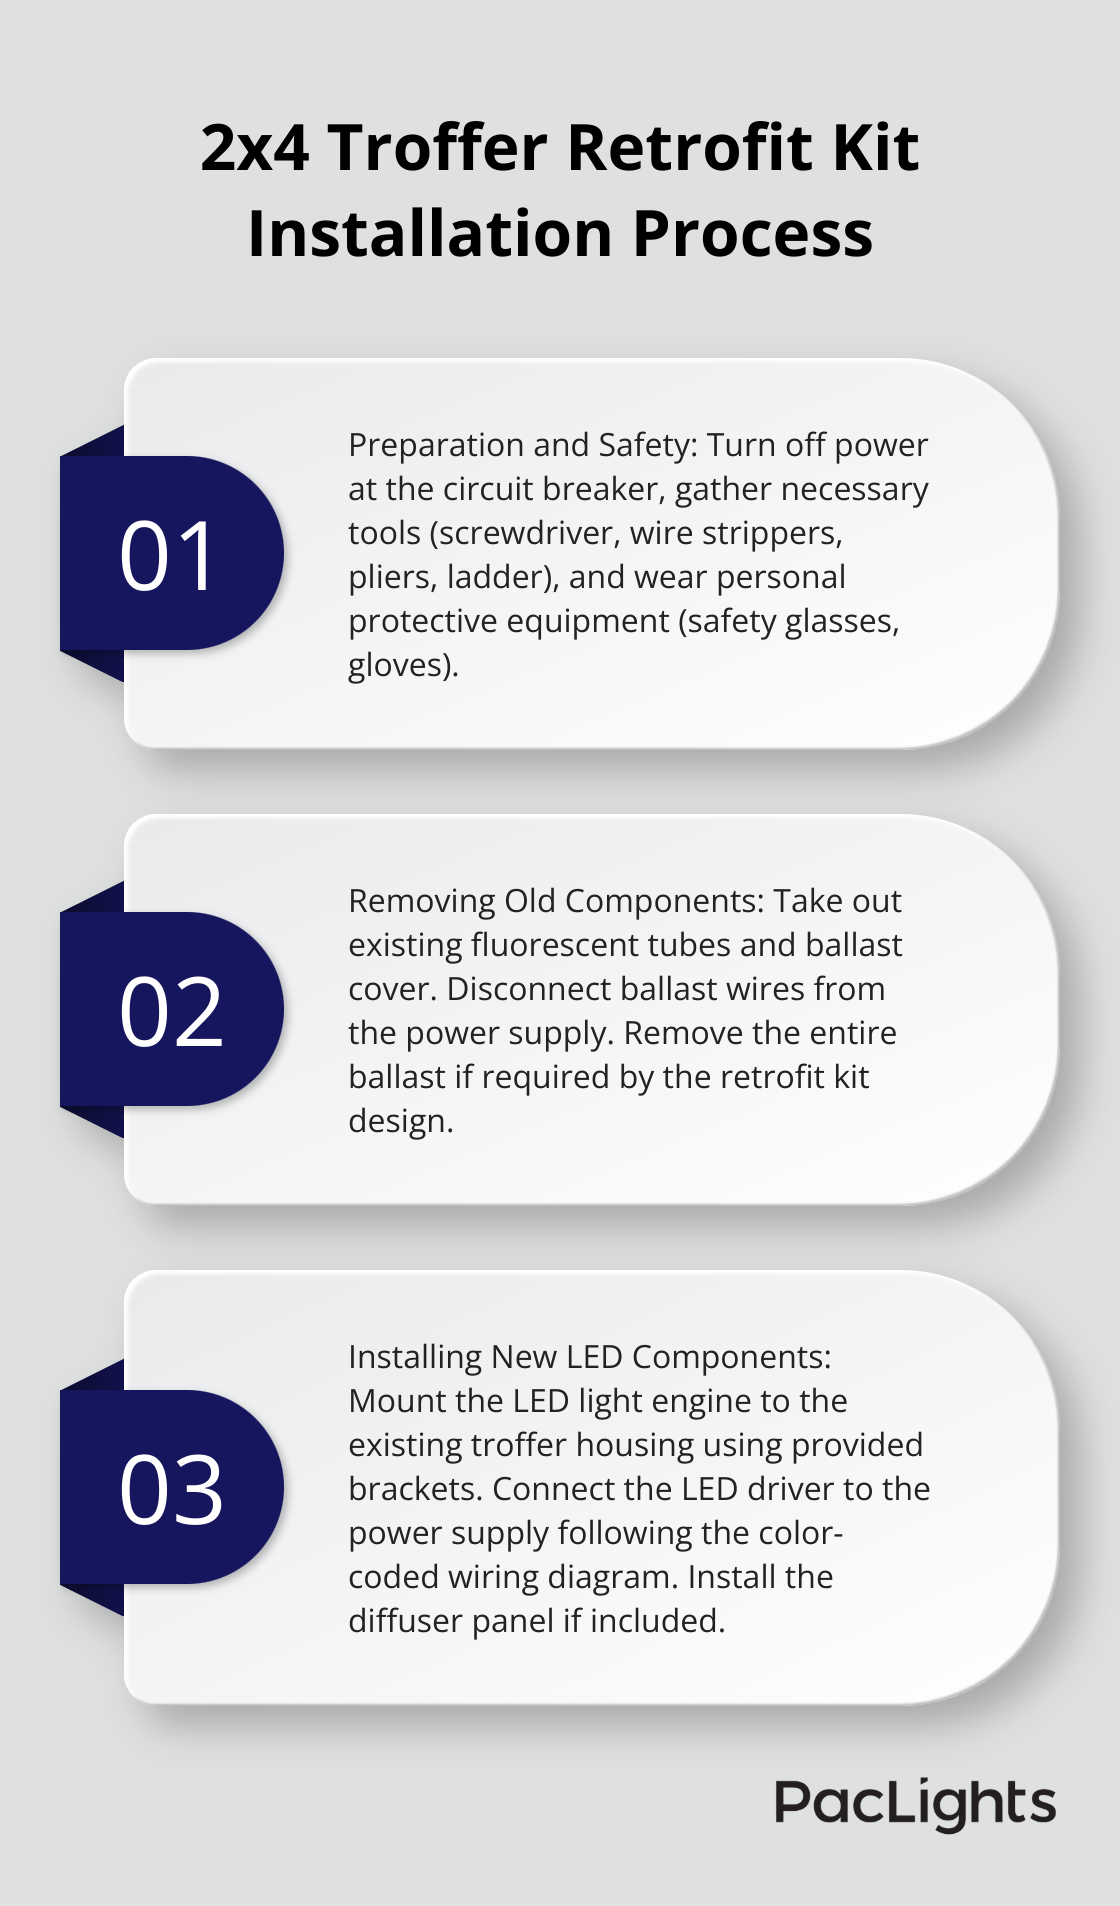
The installation of a 2×4 troffer retrofit kit starts with safety. Turn off the power to the existing fixture at the circuit breaker. This step is essential for your protection. Collect all necessary tools, including a screwdriver, wire strippers, pliers, and a ladder. Don’t neglect personal protective equipment such as safety glasses and gloves.
Removing Old Components
Begin the process by taking out the existing fluorescent tubes and ballast cover. Disconnect the ballast wires from the power supply. In some instances, you might need to remove the entire ballast, depending on the retrofit kit’s design. The U.S. Department of Energy advises proper recycling of these components (due to the presence of mercury in fluorescent tubes).
Installing New LED Components
Mount the LED light engine to the existing troffer housing using the provided brackets. This step often requires no tools, making it quick and efficient. Connect the LED driver to the power supply, following the color-coded wiring diagram included with your kit. If your kit includes a diffuser panel, install it last to ensure even light distribution.
Testing and Troubleshooting
After installation, turn the power back on and test the new LED fixture. If you encounter issues, check all connections again. The Illuminating Engineering Society notes that most installation problems stem from incorrect wiring, so pay extra attention to this step.
Common Challenges and Solutions
One frequent challenge is compatibility with existing dimmer switches. Not all LED retrofit kits work with dimmers, so confirm compatibility before installation. Older buildings might present outdated wiring. In such cases, consult a licensed electrician to ensure proper installation and compliance with current electrical codes.
Some installers face difficulties fitting new components into older troffer housings. Many modern retrofit kits feature adjustable mounting options to accommodate various housing sizes. However, if you encounter fit issues, contact the manufacturer for guidance on potential solutions.
The entire installation process typically takes less than 30 minutes per fixture for an experienced installer. This efficiency minimizes workplace disruption and allows for quick completion of large-scale lighting upgrades.
While DIY installation is possible, professional installation ensures optimal performance and maintains warranty coverage. Many businesses find that the long-term benefits of professional installation (including proper light distribution and maximum energy savings) outweigh the initial cost.
Now that we’ve covered the installation process, let’s explore how to choose the right retrofit kit for your specific needs and space requirements.
How to Select the Perfect Retrofit Kit
Assess Your Lighting Needs
The first step in choosing a 2×4 troffer retrofit kit involves evaluating your current lighting situation. Use a lux meter to measure light levels in your space. The Illuminating Engineering Society recommends specific light levels for different environments (office spaces typically require 300-500 lux, while detailed manufacturing work may need up to 1000 lux). This assessment helps you determine the required lumen output for your new LED retrofit kit.
Understand Energy Efficiency Ratings
Energy efficiency stands as a primary reason for upgrading to LED lighting. Look for retrofit kits with high lumens per watt (LPW) ratings. The Department of Energy states that LED fixtures can achieve efficacies of 160 LPW or higher, compared to about 100 LPW for the best fluorescent systems. A higher LPW rating translates to more light output for less energy input, directly impacting your electricity bills.
The DesignLights Consortium (DLC) provides a trusted certification for energy-efficient lighting products. DLC Premium certification indicates top-tier performance, often qualifying for higher utility rebates. When comparing options, prioritize DLC-listed products for assured quality and efficiency.
Consider Color Quality and Temperature
Color Rendering Index (CRI) and color temperature significantly affect the perceived quality of light. The Environmental Protection Agency recommends a CRI of 80 or higher for most commercial applications. Higher CRI values (90+) benefit retail, healthcare, and other settings where color accuracy is critical.
Color temperature, measured in Kelvin (K), influences the ambiance of your space. Offices and educational facilities often benefit from cooler temperatures (4000K-5000K) that promote alertness, while warmer tones (2700K-3500K) create a more relaxing atmosphere in hospitality settings.
Check Compatibility and Installation Ease
Ensure the retrofit kit is compatible with your existing troffer housing. Some kits offer adjustable mounting options to fit various sizes, reducing installation challenges. The National Electrical Manufacturers Association (NEMA) provides guidelines for retrofit kit compatibility. Adhering to these standards ensures a smoother installation process and reduces the risk of future issues.
Evaluate Control Options and Future-Proofing
Consider retrofit kits that offer dimming capabilities and compatibility with smart lighting controls. The American Council for an Energy-Efficient Economy reports that implementing advanced controls can lead to an additional 30-50% energy savings beyond the switch to LEDs. Try to find options that support 0-10V dimming or are compatible with wireless control systems for maximum flexibility.
Final Thoughts
2×4 troffer retrofit kits offer substantial benefits for businesses and facilities. These kits modernize outdated fluorescent systems, reduce energy consumption (up to 75%), and lower operational costs. The improved lighting quality enhances visual comfort and productivity in various work environments, while the long lifespan of LEDs minimizes maintenance requirements.
The installation process for these retrofit kits takes less than 30 minutes per fixture, which minimizes disruption to daily operations. Compatibility with existing troffer housings eliminates the need for extensive renovations, which reduces both installation costs and potential workplace disturbances. PacLights understands the importance of efficient, high-quality lighting solutions for commercial and industrial facilities.
PacLights offers a range of LED retrofit options, including 2×4 troffer retrofit kits, designed to meet diverse lighting needs while optimizing energy use. We provide free lighting layout designs and ROI assessments to help you make informed decisions about your lighting upgrade project. Our products feature optional daylight and motion controls, as well as advanced lighting control systems, to further enhance energy savings and customize your lighting experience.
Disclaimer: PacLights is not responsible for any actions taken based on the suggestions and information provided in this article, and readers should consult local building and electrical codes for proper guidance.