

LED recessed down lighting transforms any space with clean, modern illumination that saves energy and reduces maintenance costs.
We at PacLights see homeowners struggle with selecting the right fixtures for their specific needs. The wrong choice leads to poor lighting quality, higher electricity bills, and frequent bulb replacements.
This guide covers everything from technical specifications to room-specific requirements, helping you make informed decisions for your home lighting project.
Understanding LED Recessed Down Lighting Basics
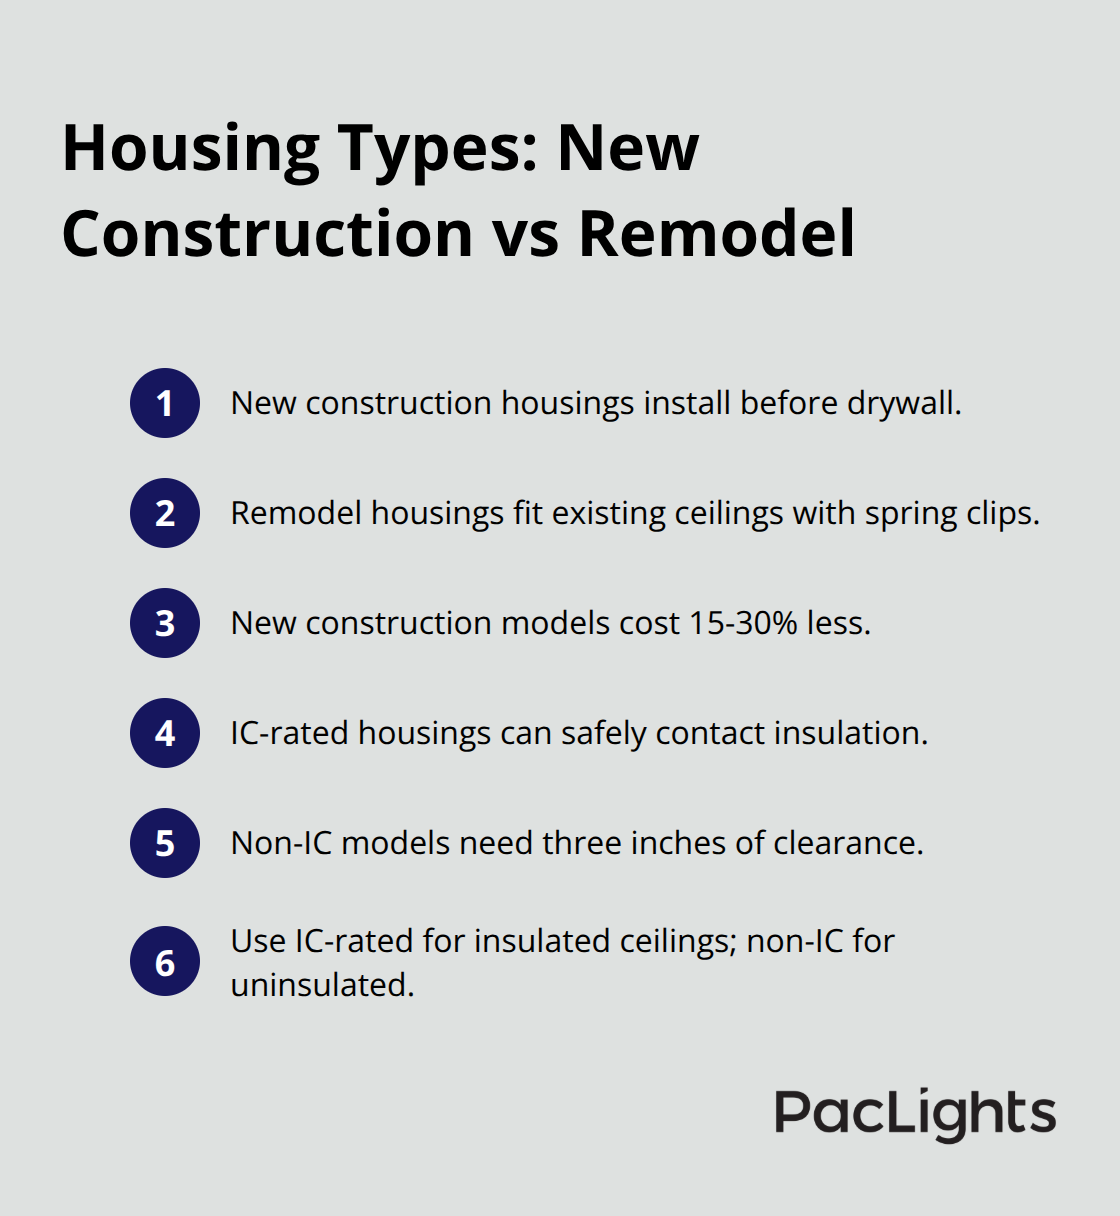
New Construction vs Remodel Housing Types
New construction housing requires installation before drywall completion, while remodel housing fits into existing ceilings through spring clips. New construction models cost 15-30% less and offer better insulation contact, but remodel versions provide flexibility for existing homes. IC-rated housings contact insulation safely, while non-IC models need three inches clearance to prevent fire hazards. Choose IC-rated for insulated ceilings and non-IC only for uninsulated applications.
Key Technical Specifications to Know
Color temperature ranges from 2700K warm white for bedrooms to 4000K cool white for kitchens. The U.S. Department of Energy reports LED fixtures last 15,000 to 25,000 hours compared to 1,000 hours for incandescent bulbs. Color Rendering Index above 90 provides accurate color representation for detailed tasks. Beam angles between 30-40 degrees create focused task lighting, while 60+ degrees offer ambient illumination. Lumens output should match room size: 800-1600 lumens per 100 square feet for general lighting. Dimmable drivers prevent flicker and extend fixture life when paired with compatible controls.
Energy Efficiency and Cost Savings
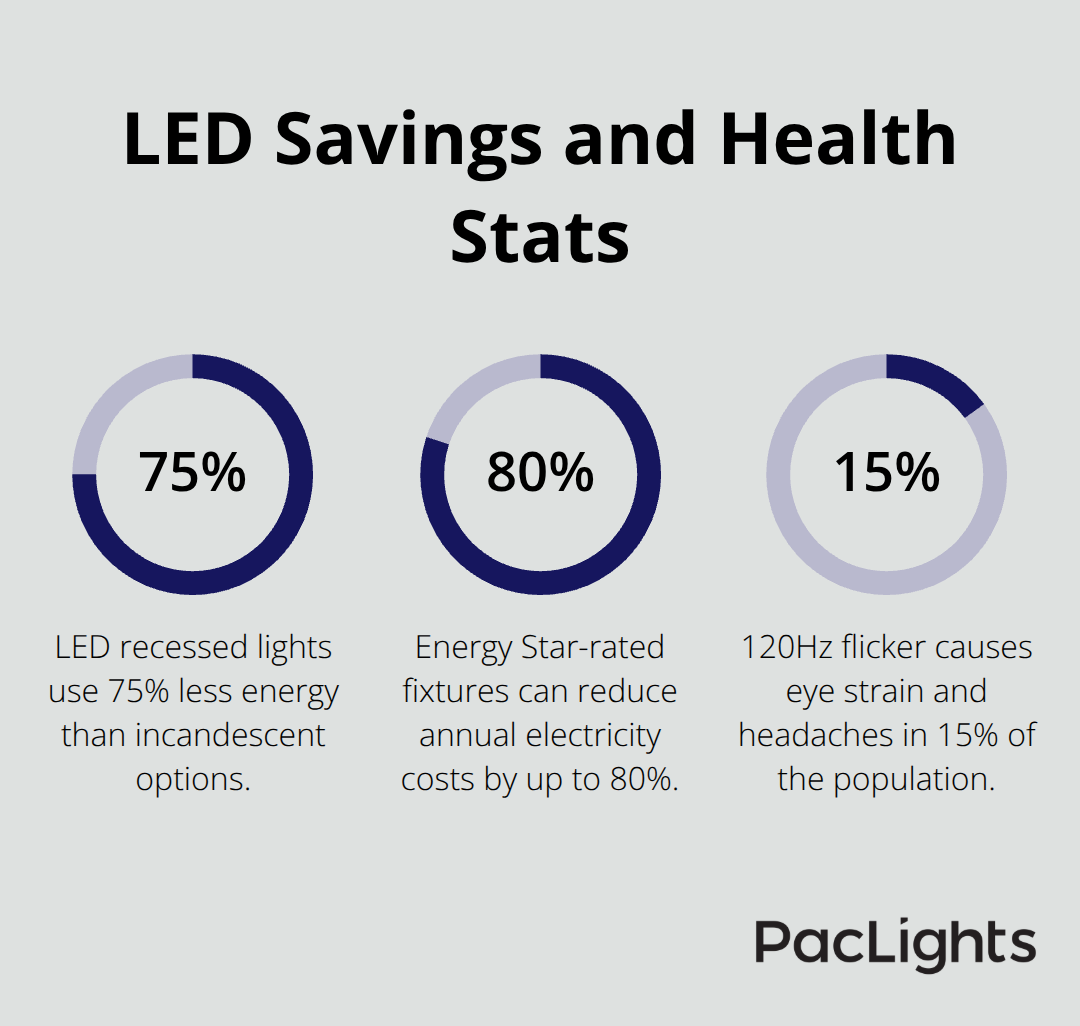
LED recessed lights consume 75% less energy than incandescent alternatives while they produce equivalent light output. Energy Star-rated fixtures reduce electricity costs by up to 80% annually. A typical 6-inch LED downlight uses 12-15 watts compared to 65 watts for incandescent equivalents (a reduction of over 75%).
Installation costs range $100-300 per room, but energy savings recover this investment within 18-24 months through reduced utility bills and eliminated bulb replacements.
These technical foundations help you understand what separates quality LED downlights from basic options. Next, we’ll examine how different rooms require specific fixture characteristics to achieve optimal illumination.
Which Rooms Need Specific LED Downlight Features
Kitchen and Dining Area Requirements
Kitchens demand 4000K color temperature for accurate food preparation visibility, while dining areas perform best with 2700K to 3000K for comfortable meal experiences. You should install 4-6 inch recessed lights with reflector trim over countertops, which provide 50-75 foot-candles of task lighting according to Illuminating Engineering Society standards. Space fixtures 4 feet apart above work surfaces and 6 feet apart for general kitchen illumination. Dining rooms require dimmable LED downlights positioned 30 inches from table edges to prevent glare during meals. Use narrow beam angles of 30-40 degrees over kitchen islands and wide 60+ degree beams for ambient dining lighting.
Living Room and Bedroom Specifications
Living rooms need layered lighting with 2700K to 3000K temperature for relaxation. Install 6-inch fixtures spaced 8 feet apart for general lighting, supplemented with 4-inch adjustable downlights for accent purposes. Target 20-30 foot-candles for ambient lighting and 50 foot-candles for reading areas. Bedrooms require 2700K warm white exclusively, with fixtures positioned away from bed locations to prevent sleep disruption. Use dimmable controls that reduce to 1600K with warm dim technology for evening comfort.
Bathroom and Hallway Applications
Bathrooms require wet-rated IC fixtures with 3000K to 4000K color temperature for tasks like shaving and makeup application. Install 4-inch downlights 3 feet from shower areas and position fixtures to eliminate shadows around vanity mirrors. Hallways need 3000K temperature with 4-inch fixtures spaced every 6-8 feet for safe navigation. Motion sensors in hallways reduce energy consumption by 30-50% (according to Department of Energy studies). Bathroom installations demand GFCI protection and vapor-tight housings to prevent moisture damage.
These room-specific requirements form the foundation for proper fixture selection, but proper installation requires careful attention to spacing calculations and beam angle considerations.
How Do You Plan Perfect LED Downlight Installation?
Calculate Spacing for Even Light Distribution
Proper spacing prevents dark spots and overlighting that wastes energy. The spacing criterion formula determines maximum fixture distance: multiply your ceiling height by the fixture’s spacing criterion rating. A 6-inch LED downlight with SC rating 1.2 at 8-foot ceilings allows maximum 9.6-foot spacing between fixtures. Kitchen task areas need fixtures every 4 feet, while living rooms work with 6-8 foot spacing for ambient lighting. Start with manufacturer spacing guidelines, then adjust based on room function and personal preferences.
Match Beam Angles to Ceiling Heights
Standard 8-foot ceilings work best with 60-degree beam angles for general lighting, while 9-12 foot ceilings need 40-50 degree beams to concentrate light effectively. Narrow 30-degree beams create dramatic accent lighting but require more fixtures for adequate coverage. The National Electrical Manufacturers Association reports that mismatched beam angles reduce lighting efficiency by 25-40%. Vaulted ceilings above 12 feet demand adjustable gimbal trim to direct light where needed rather than scatter uselessly.
Choose Smart Controls and Dimming Integration
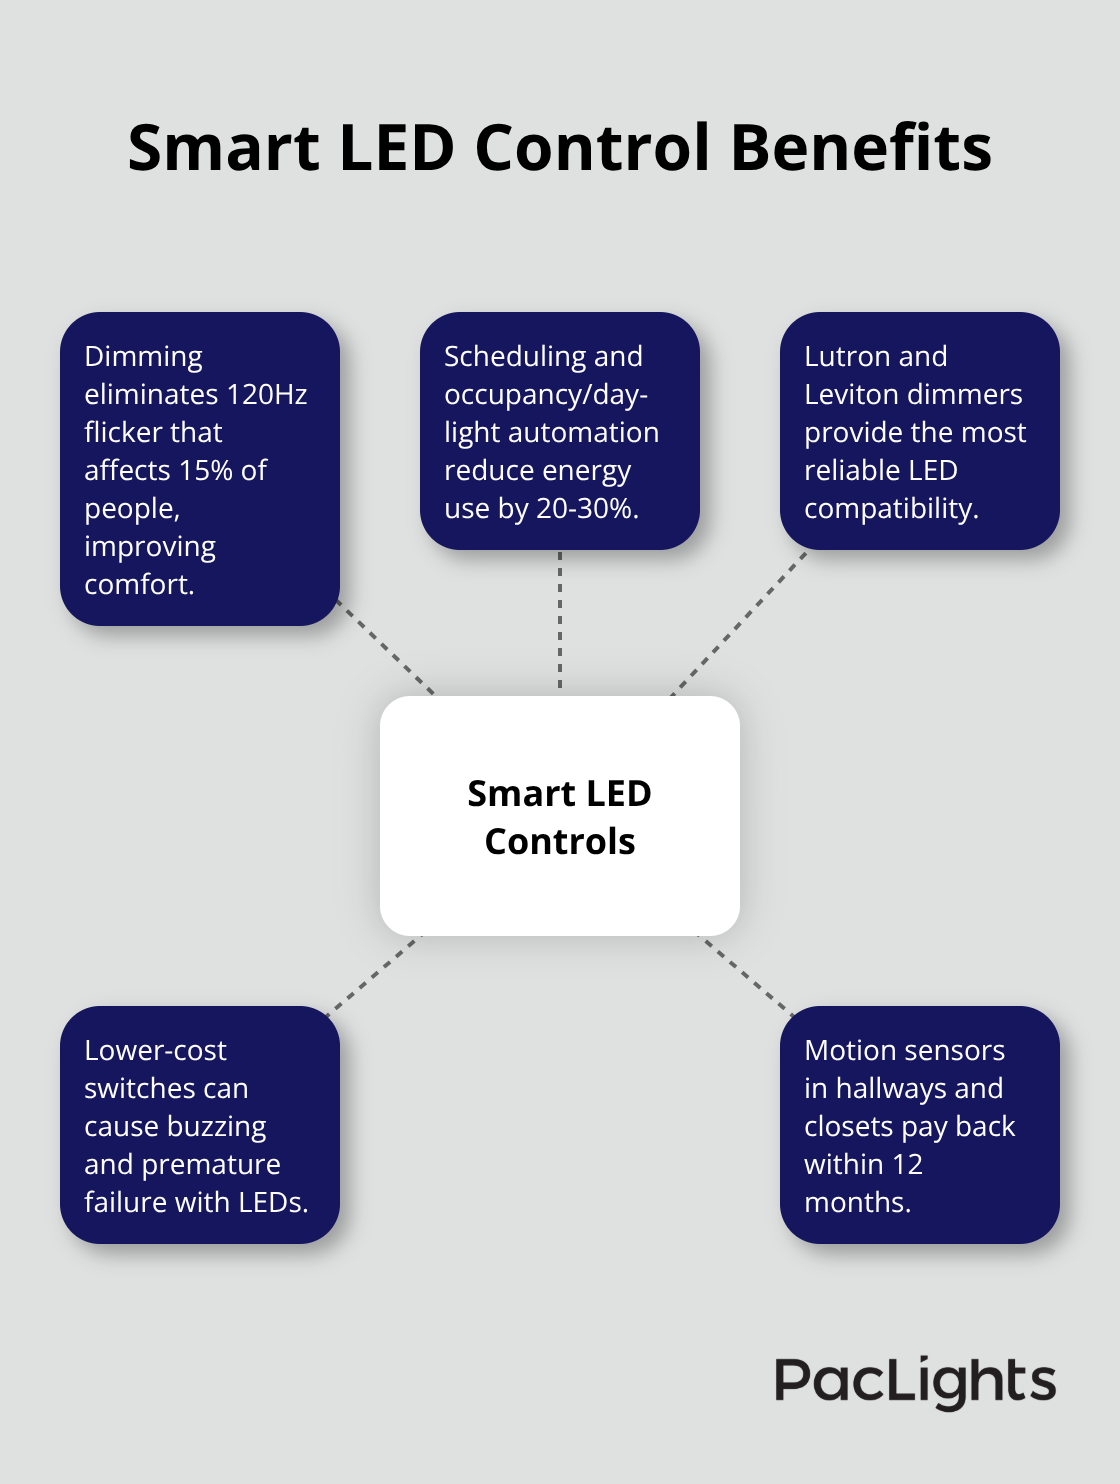
Dimmable LED drivers prevent the 120Hz flicker that causes eye strain and headaches in 15% of the population (according to IEEE studies). Smart controls with scheduling reduce energy consumption by 20-30% through automatic adjustments based on occupancy and daylight levels. Lutron and Leviton dimmer switches offer the most reliable LED compatibility, while cheaper alternatives often cause buzzing and premature failure. Motion sensors in hallways and closets pay for themselves within 12 months through reduced runtime.
Install Advanced Control Systems
Smart switches remember brightness preferences for different times of day to maximize comfort and efficiency. Networked lighting controls optimize energy use across multiple rooms simultaneously. These systems track usage patterns and adjust automatically to reduce waste. Professional installation ensures proper compatibility between LED drivers and control systems (preventing common issues like flickering or shortened lifespan).
Final Thoughts
LED recessed down lighting selection demands careful attention to technical specifications and room requirements. Color temperatures between 2700K-4000K, CRI ratings above 90, and appropriate beam angles deliver optimal illumination for each space. These fixtures consume 75% less energy than incandescent alternatives and generate substantial long-term savings.
Your investment pays for itself within 18-24 months through lower electricity bills and zero bulb replacement costs. LED fixtures operate for 15,000-25,000 hours while smart controls add 20-30% energy savings through automated optimization (according to Department of Energy studies). Professional installation prevents compatibility problems between LED drivers and dimming controls that cause flickering or shortened fixture life.
Calculate your room’s requirements using manufacturer spacing guidelines and choose IC-rated housings for insulated ceilings. We at PacLights offer comprehensive lighting solutions with advanced controls and professional design services. Contact us for expert guidance on your home lighting upgrade project.
Disclaimer: PacLights is not responsible for any actions taken based on the suggestions and information provided in this article, and readers should consult local building and electrical codes for proper guidance.